The last step before you finish setup is Recommended setup. It explains optional but useful steps: installing HACS Kiosk Mode (or similar) for a clean dashboard view, and using Guided Access so the device stays in the app. The app can’t enable Guided Access for you—you do that in iOS Settings.
What you’ll need #
- Completed Admin PIN step (tap Continue).
- The device you’ll use as the kiosk (iPad or iPhone).
- Optional: HACS Kiosk Mode (or your kiosk frontend) already set up in Home Assistant so the “Append ?kiosk” dashboard URL works as intended.
Step 1: Open the Recommended setup step #
After you tap Continue on the Admin PIN step, the Recommended setup screen appears. You’ll see sections for HACS Kiosk Mode, Guided Access & Always On, and How-to & information, plus a Finish button at the bottom.
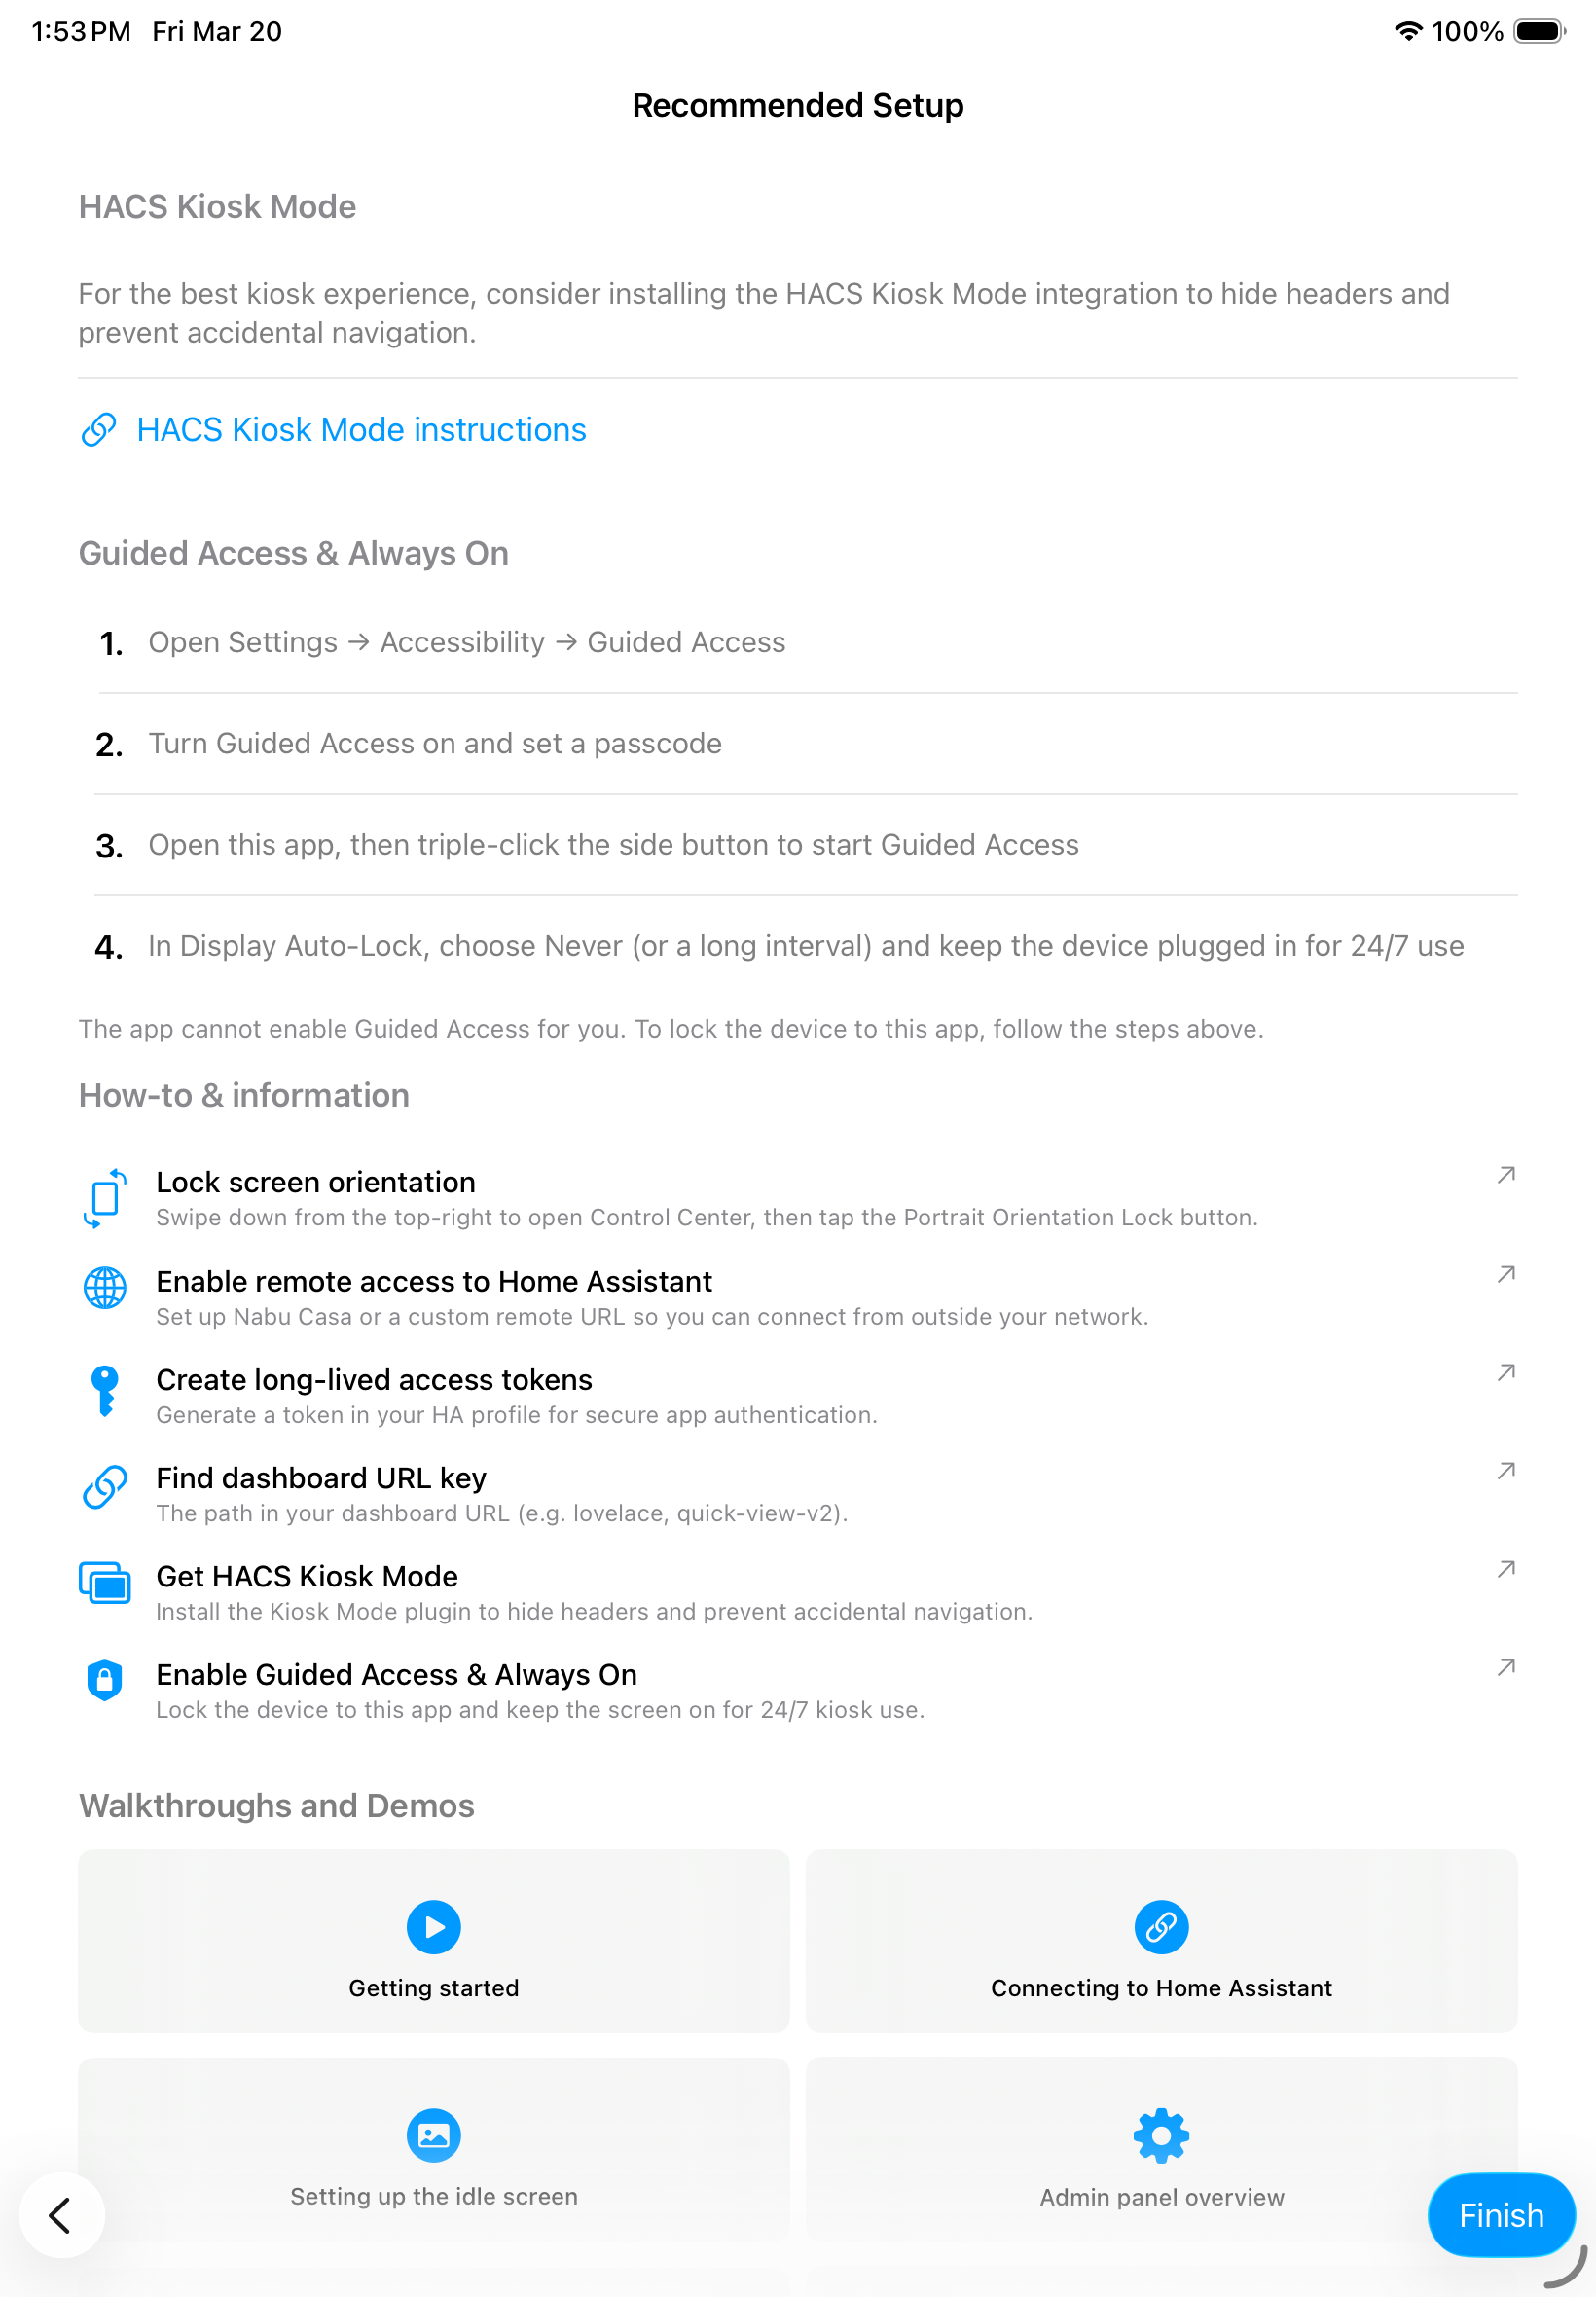
Step 2: HACS Kiosk Mode (optional) #
The app recommends installing a kiosk-mode solution (e.g. HACS Kiosk Mode) in Home Assistant so your dashboard can hide headers and limit navigation when you use Append ?kiosk in the app. Tap HACS Kiosk Mode instructions (or the link shown) to open the guide in your browser, then install and configure it in HA if you want a clean kiosk display.[Screenshot: Recommended setup step with “HACS Kiosk Mode” section expanded and link visible.]Optional diagram notation: A. HACS Kiosk Mode (heading) | B. Short description text | C. HACS Kiosk Mode instructions (link).
Step 3: Guided Access & Always On #
To lock the device to this app so users can’t leave it:
- Open Settings → Accessibility → Guided Access on the device.
- Turn Guided Access on and set a passcode (different from your app Admin PIN).
- Open this app, then triple-click the side button to start Guided Access. The device is now locked to the app until you triple-click again and enter the passcode.
- In Settings → Display & Brightness → Auto-Lock, set Never (or a long interval) and keep the device plugged in for 24/7 use.
The app cannot enable Guided Access for you; you must complete these steps in iOS.
Step 4: How-to & information #
The How-to & information section points to short guides (e.g. lock orientation, remote access, long-lived tokens, dashboard URL, HACS Kiosk Mode, Guided Access). You can open it again later from Admin → Account → How-to & information.
Step 5: Finish setup #
Tap Finish to complete onboarding. The app saves your settings and loads your dashboard. You can change anything later in the Admin panel (open with the admin gesture, then enter your PIN or use Face ID / Touch ID if required).
Troubleshooting #
- Guided Access doesn’t start — Confirm it’s enabled under Settings → Accessibility → Guided Access and that you’re triple-clicking the side button (not the Home button on older devices). Set a passcode if prompted.
- Device sleeps or locks — Set Settings → Display & Brightness → Auto-Lock to Never (or a long interval) and keep the device plugged in. For “keep screen on” inside the app, use Admin → Device → Keep screen on.
- Dashboard still shows HA header/nav — Ensure Append ?kiosk is on in the app (Admin → Dashboards) and that a kiosk-mode solution (e.g. HACS Kiosk Mode) is installed and active for that dashboard in Home Assistant.
Next step #
Setup is complete. For day-to-day use, see Opening the Admin panel (gesture and PIN) when you need to change settings, and Admin panel overview for all admin sections.