What you’ll need #
- Your Home Assistant instance running and reachable (on your network or via Nabu Casa).
- For Nabu Casa: your Nabu Casa remote URL (e.g. https://your-name.ui.nabu.casa).
- For local or custom: your HA URL (e.g. http://192.168.1.90:8123 or your HTTPS domain).
Step 1: Open the connection step #
After tapping Get Started on the welcome screen, you’ll see the connection step.
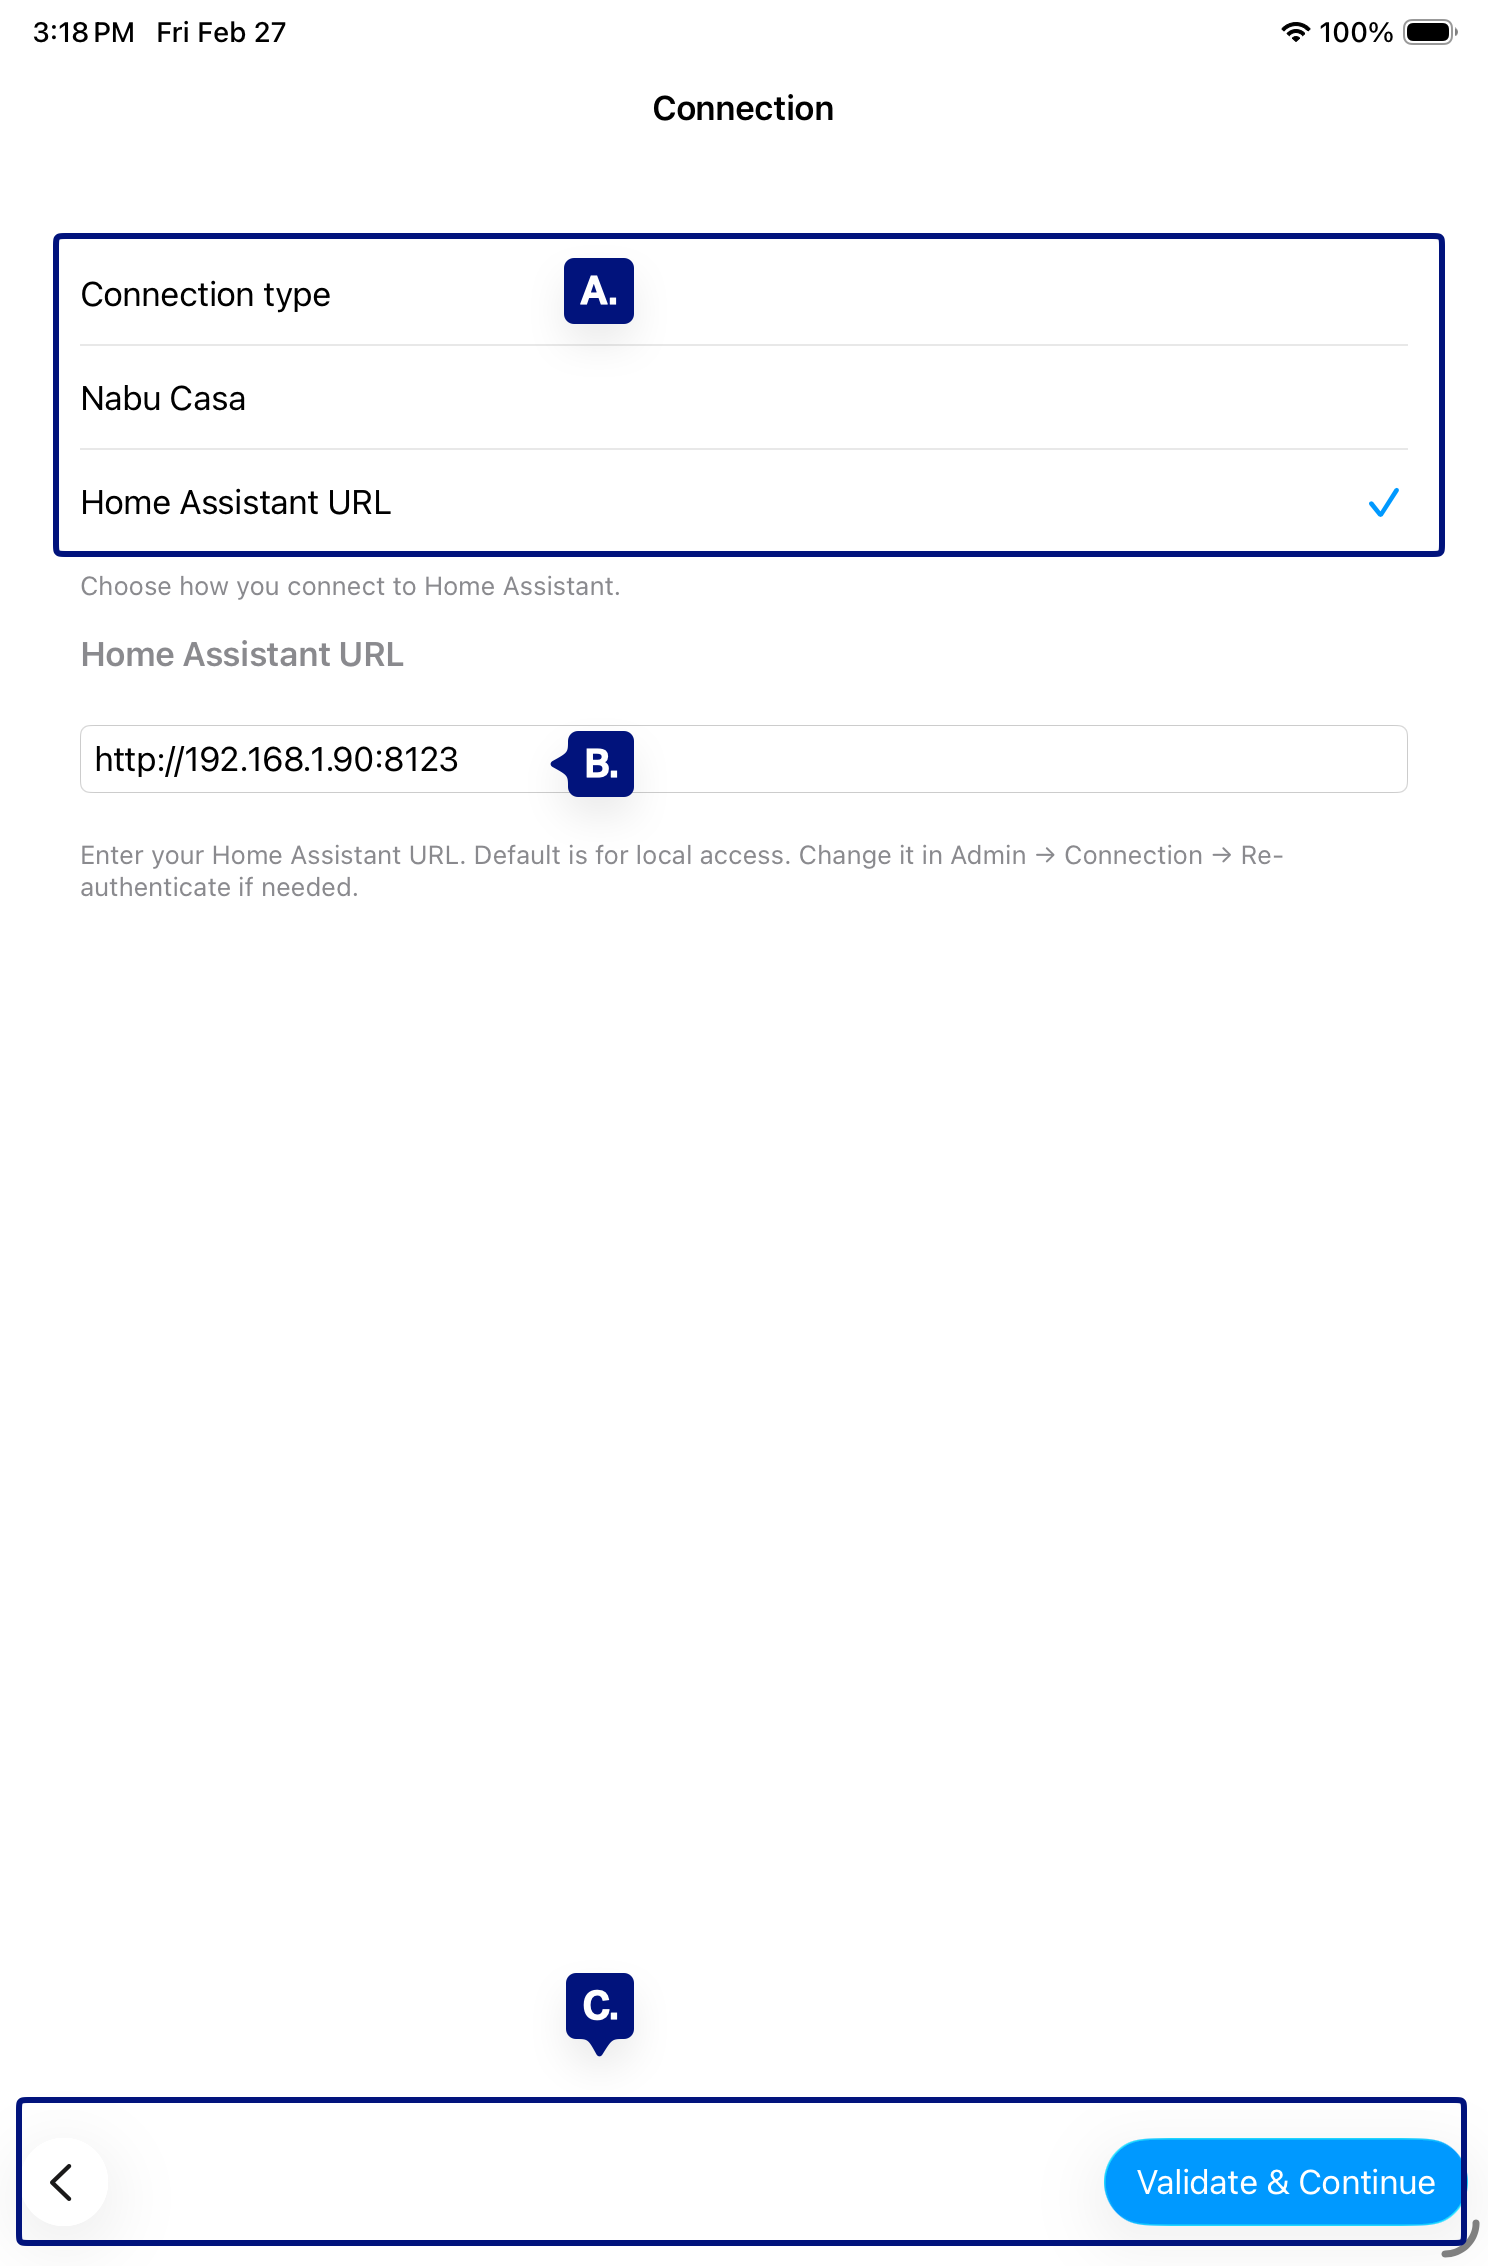
A. Connection type (Nabu Casa / Home Assistant URL)
A. URL field
C. Onboarding Navigation = Continue or Back.
Step 2: Choose how you connect #
Pick the option that matches how you access Home Assistant:
- Nabu Casa — You use Nabu Casa remote access. The app will use your Nabu Casa URL.
- Home Assistant URL — You use a local IP, DuckDNS, or another custom URL (HTTP or HTTPS).
[See A. Above]
Step 3: Enter your Home Assistant URL #
In the URL or Connection field, enter the full base address of your Home Assistant instance. Do not include a path (e.g. no /lovelace or /config).Examples:
- Nabu Casa: https://your-name.ui.nabu.casa
- Local: http://192.168.1.90:8123
- Custom domain: https://ha.yourdomain.com
The app will validate the URL before you continue. If the format is wrong, you’ll see an error and won’t be able to proceed until it’s fixed.
[See B. Above]
Step 4: Continue to sign in #
When the URL is valid, tap Continue (or the equivalent button). The next step is Sign In, where you’ll authenticate with a Long-lived access token or in-app sign-in.
[See C. Above]
Troubleshooting #
- “Invalid URL” or Continue is disabled — Check for http:// or https://, no trailing slash, and no path (e.g. no /lovelace). Port is required if not 80/443 (e.g. :8123).
- Using Nabu Casa — Use the exact URL from your Nabu Casa subscription (e.g. https://your-name.ui.nabu.casa), not your local IP.
- Remote access — For a URL outside your home network, ensure remote access (Nabu Casa or your own) is set up and working in a browser first.
Next step #
After connecting, see Signing in (long-lived access token) to complete authentication.