After you sign in, the app needs to know which Home Assistant dashboard to show. On the dashboard path step you set the Dashboard path, a display name, Tab Icon (for Pro tab navigation), and whether to use kiosk mode (Append ?kiosk) for a clean, full-screen view. Pro users can also import all settings via QR on this step.
What you’ll need #
- Successful sign-in (Long-lived access token accepted).
- The Dashboard path from Home Assistant (e.g. lovelace, quick-view, or the path segment in your dashboard URL).
- For Import all settings (Pro QR Scan) and Tab Icon in tab navigation: an active Pro subscription.
Step 1: Open the dashboard step #
After you tap Submit on Sign In, the dashboard (or “Choose your dashboard”) step appears. You’ll see:
- Pro only: Import all other settings (Pro QR Scan) — scan a QR code from another device to import all settings (dashboards, connection, idle screen, etc.); you’ll still sign in and set the Admin PIN on this device.
- Dashboard path (field).
- Display name (field).
- Append ?kiosk (HACS Kiosk Mode) (toggle).
- Tab Icon — the icon shown for this dashboard in the tab bar when you have multiple dashboards and Pro (tab bar is a Pro feature). If you only have one dashboard or don’t use the tab bar, this icon isn’t shown in the UI but can be set for when you add more dashboards later.
- Continue / Back.
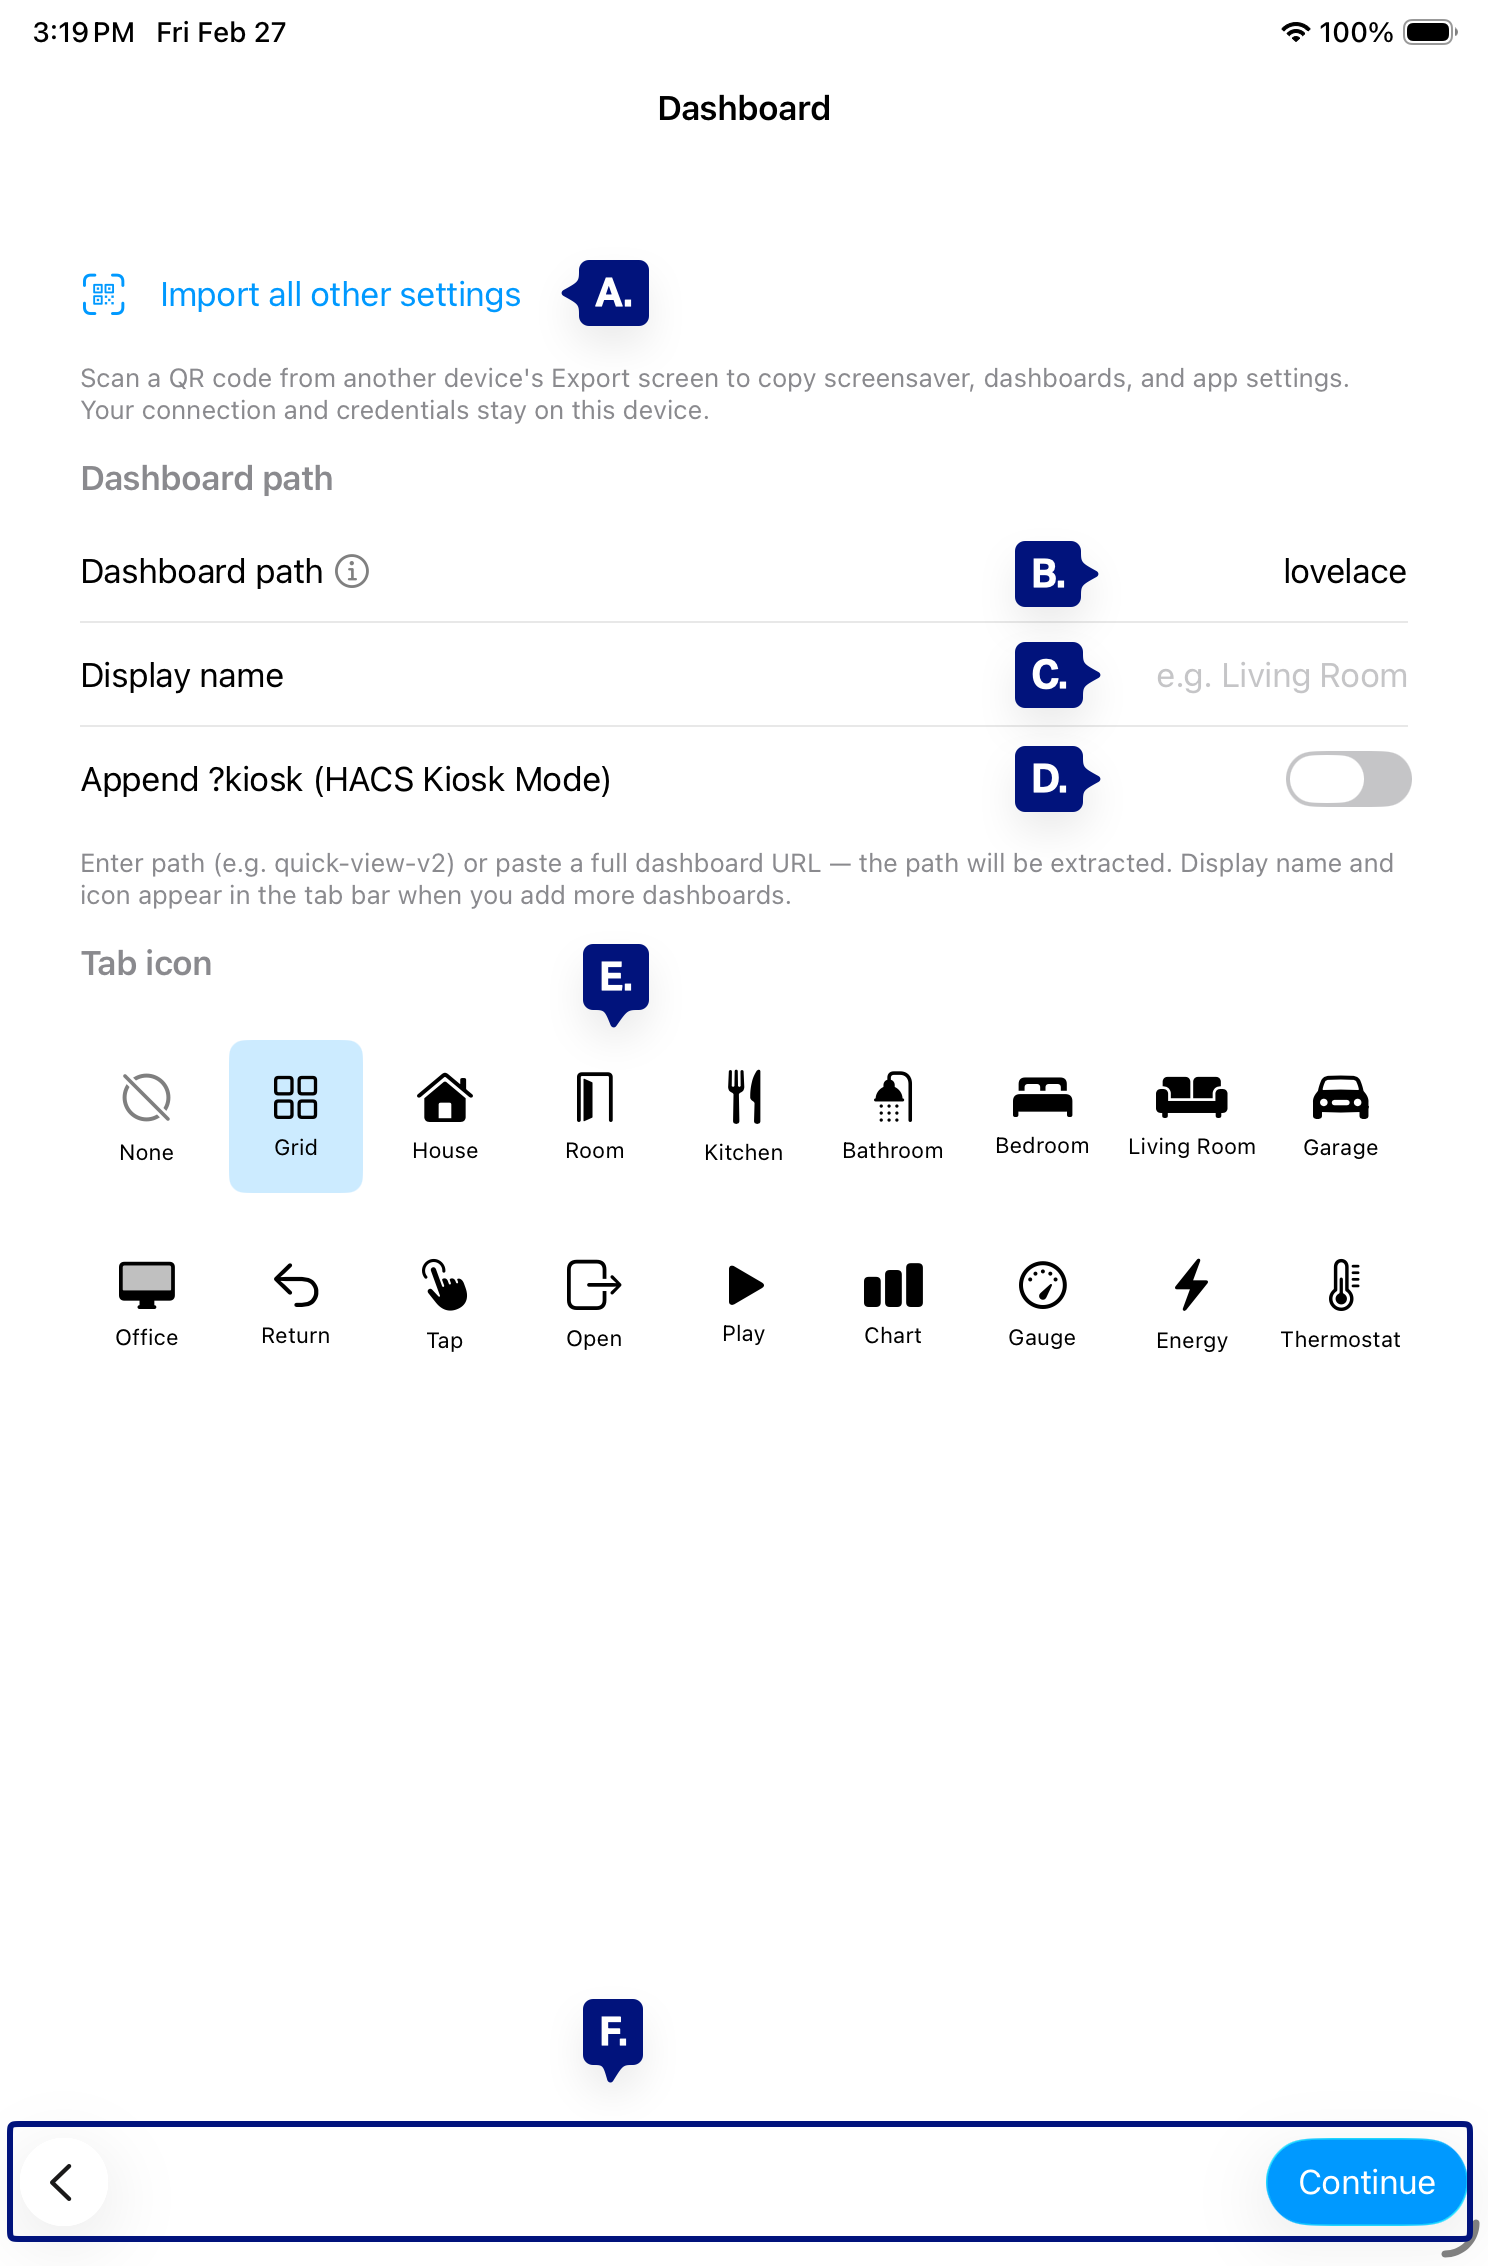
A. Import all other settings (Pro QR Scan)
B. Dashboard path (field)
C. Display name (field)
D. Append ?kiosk (HACS Kiosk Mode) (toggle)
E. Tab Icon (used in tab navigation when Pro + multiple dashboards)
F. Continue / Back
Step 2: Enter the Dashboard path #
The Dashboard path is the part of the URL that identifies the dashboard in Home Assistant—no http:// or domain, just the path. If you paste in the URL it will auto adjust.
Examples:
- Default main dashboard: lovelace
- Custom dashboard: quick-view, house, or whatever path you use in your HA dashboard URL (e.g. /lovelace/quick-view → path is often lovelace/quick-view or as shown in HA).
You can find it by opening a dashboard in Home Assistant and checking the address bar; the path is everything after the host and port.
[See B. Above]
Step 3: Set a display name (optional) #
Give the dashboard a short display name so you can recognize it in the app. With Pro and multiple dashboards, this name appears in the tab bar next to the Tab Icon. If you leave it blank, the app typically uses the path as the name.
[See C. Above]
Step 4: Turn on Append ?kiosk (recommended) #
For a kiosk-style view (no header/navigation), enable Append ?kiosk (HACS Kiosk Mode). The app adds ?kiosk to the dashboard URL so your frontend (e.g. HACS Kiosk Mode or kiosk-mode) can hide the UI. Your dashboard will look like a dedicated display, not the normal HA interface.
[See D. Above]
Step 5: Choose Tab Icon (Pro tab navigation) #
Tab Icon is the icon shown for this dashboard in the app’s tab bar. The tab bar is only available with Pro when you have multiple dashboards and turn on Show tab bar in Admin → Dashboards. On this step you can pick an icon (e.g. Grid, House, Chart, Thermostat) so that when you use the tab bar, each dashboard has a clear icon and name. If you have only one dashboard, the icon doesn’t appear until you add more dashboards and enable the tab bar.
[See E. Above]
note: in Pro you will be able to add additional dashboards from the Dashboard Admin Menu
Step 6: Continue to Idle screen setup #
Tap Continue to go to the Idle screen (screensaver) setup step. You can add more dashboards and change these settings later in Admin → Dashboards → Manage dashboards. Multiple dashboards and the tab bar (where Tab Icon is used) require Pro.
[See F. Above]
Troubleshooting #
- Dashboard doesn’t load or shows “Unable to connect” — Confirm the path matches Home Assistant (e.g. lovelace for the default UI). Check for typos and avoid a leading slash.
- Path with multiple segments — Use the full path your HA URL uses (e.g. lovelace/quick-view). The app uses this to build the full dashboard URL.
- Want a clean kiosk view — Enable Append ?kiosk and ensure a kiosk-mode solution (e.g. HACS Kiosk Mode) is installed and active for that dashboard.
- Don’t see Tab Icon or Import all settings — Tab Icon is always on the step; it’s used when you have Pro and multiple dashboards with the tab bar. Import all other settings (Pro QR Scan) appears only for Pro subscribers.
Next step #
After choosing your dashboard, see Idle screen (screensaver) setup to set the screensaver timeout, background, and “Tap for dashboard” behavior.dashboard” behavior.